OK, today we got a tutorial. One of the things that MD users modeling for Poser have struggled with is getting models from Poser to MD and back in the proper scale. See, the problem here is that in most 3D programs, 1 unit represents a real world inch, or a centimeter, or a millimeter. In Poser, 1 unit represents 103 inches, or 8.6 feet, or 261.6 centimeters. I'm sure it made sense to someone at one time. OK, that's a lie. I'm not convinced that has ever made sense to anyone, anywhere, anytime. However, it's what we got, so we have to work with it.
Poser's stupidly small scale causes all sorts of problems when we try to play with the rest of the 3D graphics world, and MD is just an example of that.
Now, I generally use the free program Objaction Scaler, so that's what I'll be assuming for this tutorial. (BTW, sorry about the artifacts on the screen caps. I didn't realize they were saving that way until I was done with everything.)
1. Start in Poser. Load up the figure you want to make clothes for. Turn off IK, and completely zero the figure. If you're ultimately going to be making conforming clothes, you might want to use PhilC's "Super Zero" script if you have it or even start with the figure's OBJ instead of exporting from Poser, to make absolutely sure you have everything zeroed. If you're doing dynamic, the zero within Poser is what you want to match.
2. On the menu bar, go to File->Export->Wavefront OBJ...
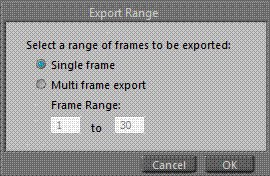
3. Poser brings up a dialog box asking what frames you want to export. Select "Single Frame".

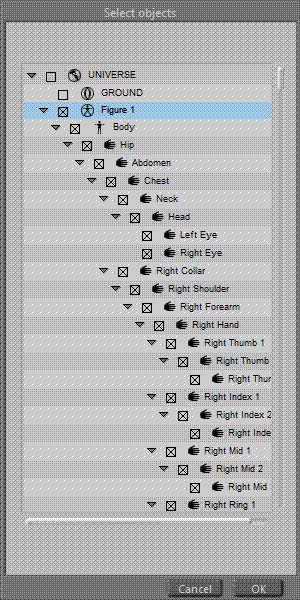
4. Next comes the "Select objects" dialog box. Make sure only your figure's bodyparts are selected. You can do this quickly by clicking the box beside "Universe" to turn everything off, then selecting the box by your figure name.

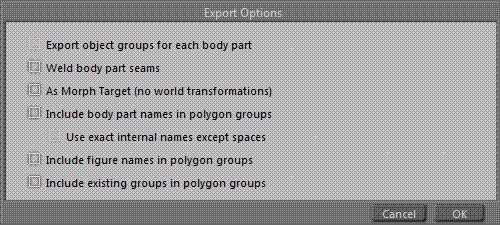
5. THIS IS THE FIRST IMPORTANT PART. Next you come to export options. If you are making dynamic clothes, do not check "As Morph Target". You can do what you want with the others, but leave this off.

If you are making conforming clothes, DO check "As morph target". If there are any hidden offsets, you want to match them.
6. Save your figure. You might want to save the Poser file at this point, so you can come back to it later instead of having to do all the zeroing and IKing again later. Open Objaction Scaler.
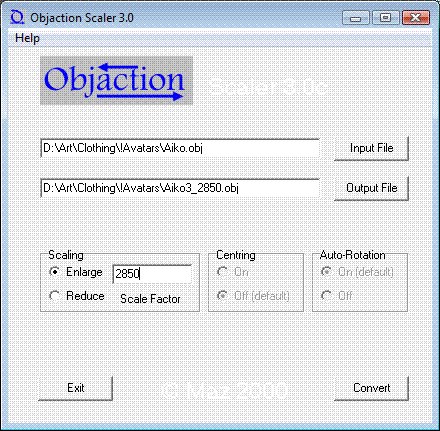
7. In Scaler, chose the figure you just exported as your input, and provide a new name and file path for your output. I always click the "Output File" and then treat it like any other save dialog to do this. It sometimes wigs out if I just type in a new file name/path.
Under the scaling factors, put in some ginormous number. Generally speaking for a typical figure, like Victoria 4, you'll want around 2500. It doesn't matter, but remember this number. I make it part of the output filename so I can reuse this avatar easily later without going "crap, how much did I scale that by" later.

(For the example, I'm exporting Aiko 3. She's pretty petite compared to the Vickies, but I want to use the same patterns for her that I do for them, so I'm making her larger than normal.)
Once everything's set, click the Convert button. It should finish pretty quickly.
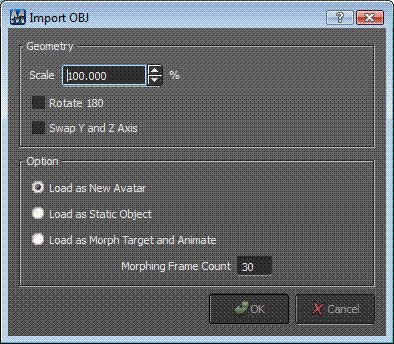
8. OK, enough with Poser. Now we're heading over to Marvelous Designer. Once it's open, go to File->Import->Obj and select the figure you scaled up in the last step.
9. THIS IS A REALLY IMPORTANT PART. Import your embiggened obj at 100% scale, and load as new avatar. Again, do not change the scaling. Leave it at 100%.

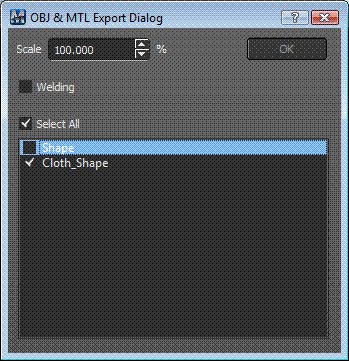
10. Do your stuff in Marvelous Designer. When you're done, go to File->Export->OBJ, and give it a file name for your awesome new outfit.
11. THIS IS ANOTHER IMPORTANT PART. In the export options, export at 100% scale. Don't try to change it in MD. Also, you'll want to uncheck "shape" on the list. That's your avatar; she doesn't need to come along for the ride.

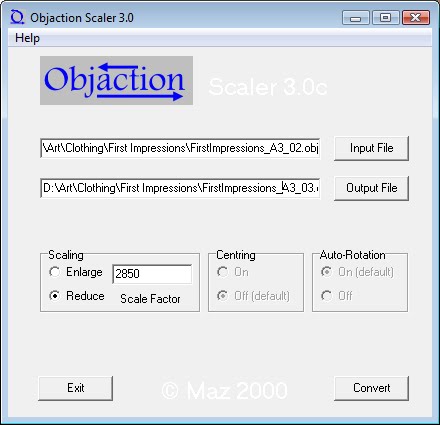
12. Time for another round in Objaction Scaler. Load up your awesome new outfit. Give it a new filename in the output box. Now, under scaling, put the same scaling factor you used for your avatar, but this time click the "Reduce" button. Click convert when you're ready.

13. I usually make a pit stop through UVMapper at this point to lay out the map like I want. All the pieces are already laid out flat for you like your pattern (which is beautiful mapping for clothing, BTW), but they're out of the 0-1 range, overlapping, and may not be in scale to each other.
Hint 1: When you bring it in to UVMapper, do not select "yes" when it asks if you want to correct out of range data. Instead let it bring it in huge, then select all and use the '/' shortcut to scale it down until it fits on the map. This keeps everything square, and then you can rearrange things and scale them relative to each other without distortion. If you let UVMapper do it, some of your pieces could end up squished in one dimension, but not the other.
Hint 2: If you don't change the pattern, MD exports the same vertices in the same order, even if you've fit your outfit to a different figure. So if you're fitting to a bunch of figures like I do, you only have to map one, and then you can import the rest, go to File->Import UVS, select the one you mapped and click OK. Identical mapping, no work. (If you had to change the pattern, though, no such luck. The mesh will be different.)
14. OK, back in Poser. Either open the file you saved when you made your avatar, or again load up your figure and zero everything. Then go to File->Import->Wavefront OBJ... and select your reduced size and optionally UVMapped
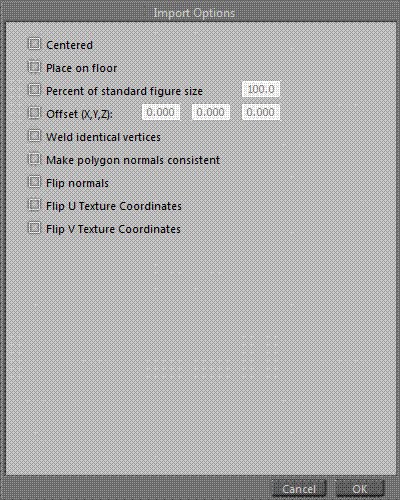
15. THIS IS THE FINAL REALLY IMPORTANT PART. Uncheck everything in the import dialog. Don't scale, don't drop to floor, don't do anything except import your outfit.

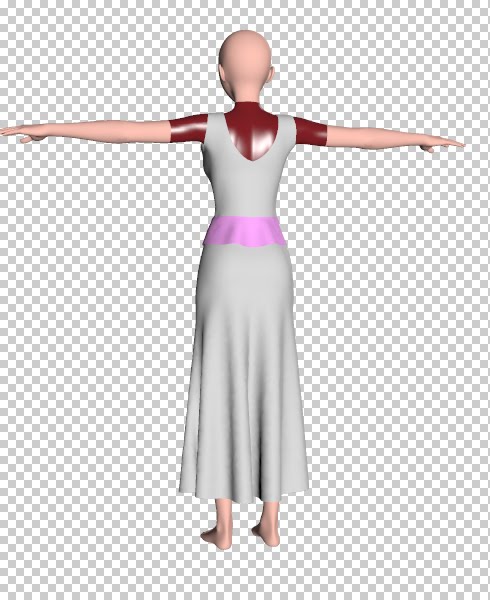
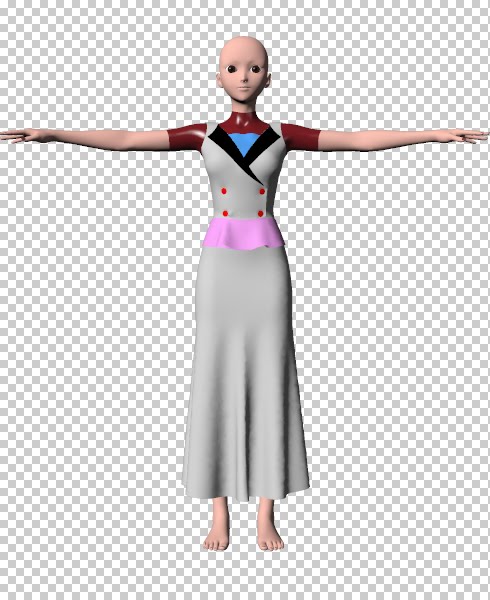
16. Ta-da! Your outfit fits. You're ready to clothify it, group it, or whatever you'd normally do at this stage.

Everything's fine in the back, too, in case you were worried.
